3D Printing Custom Keycaps for the Ergodox

WARNING AND DISCLAIMER
This was my first 3D printing experiment. Don’t use this as a definite guide.
Also, #UPDATE: after almost 2 months of use, it seems like the wax hack is failing the test of time; the wiggle got wigglier. So, I’m currently waiting for a Lili 58 Pro. What else was I going to do with my money anyway?
Why 3D print keycaps?
Long version: Quest for the Perfect Keyboard: Ergodox EZ vs. Dygma Raise
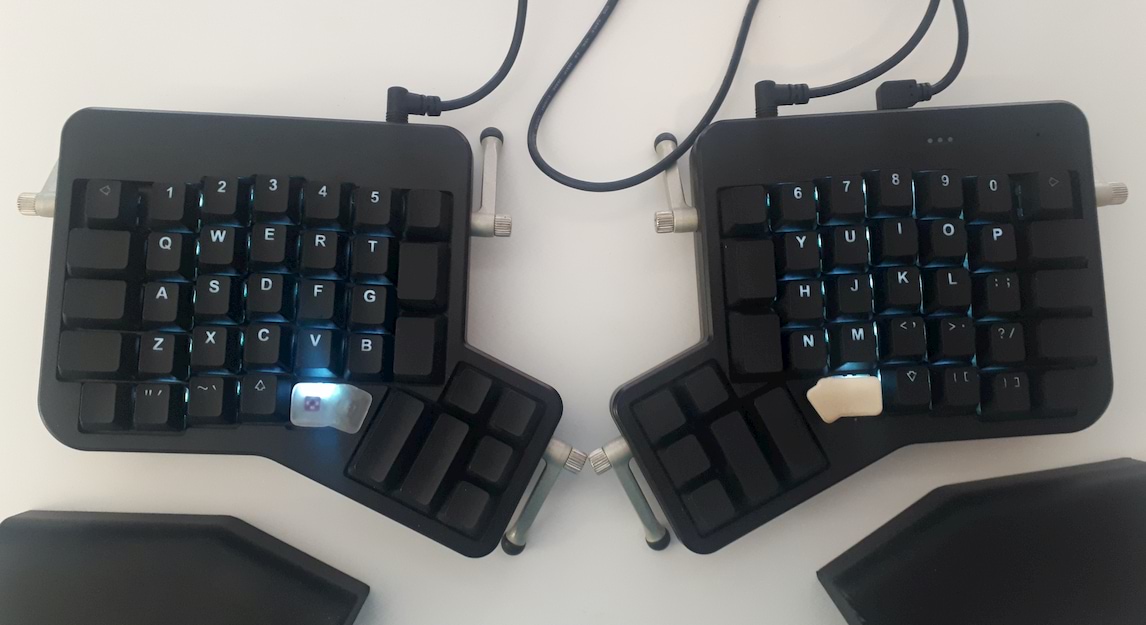
Short version: I dislike the gap between the main layout and the thumb clusters on the Ergodox.

Yeah, that gap.
My Previous Experiences with 3D printing and modelling
None.
I thought this whole thing would be as simple as modifying an existing 3D model a little, sending it to a 3D printing shop and celebrating. Alas, I’ve learned that 3D printing is both an art and a science.
First attempt
I based my custom keycaps on this flat keycap model on Thingiverse and modified it with Mesh Mixer. The modified 3D models I used are now on Thingiverse for you to marvel at.
Printing settings used:
| Material | Technology | Resolution | Cost per Keycap |
|---|---|---|---|
| Nylon 12 | SLS | 100 microns | 3.20$CAD |
I can’t tell you much more about the printing process because I simply sent the .stl files to a local 3D printing shop (FabLab) and let them do the magic.
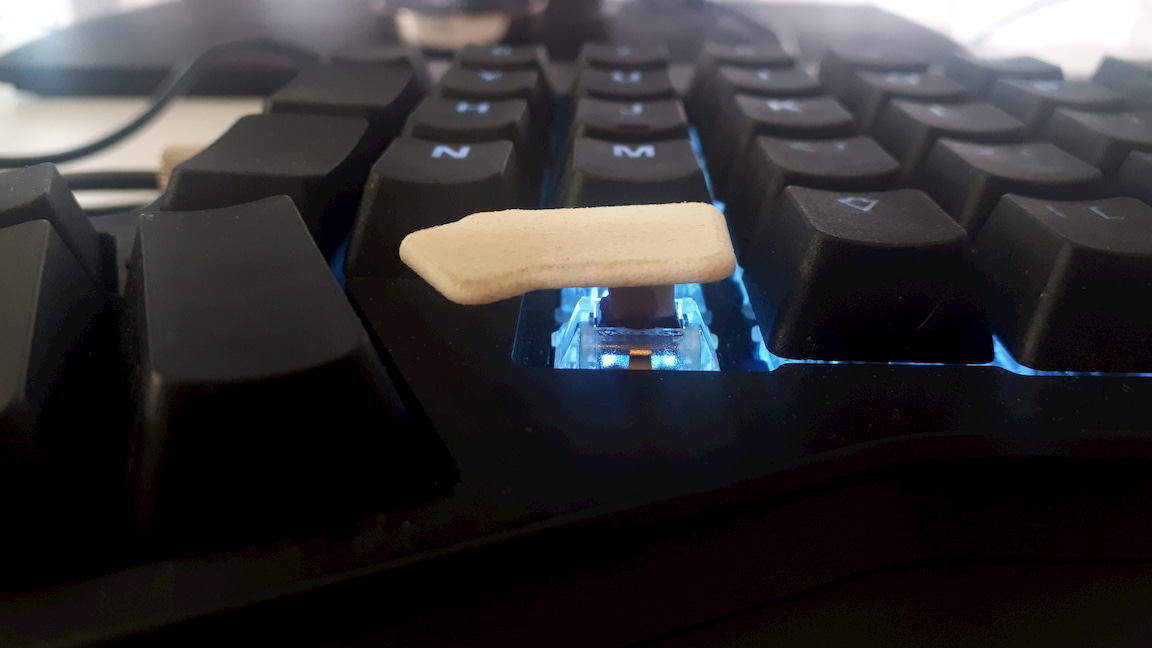
Anyways, here’s what it looks like.


The keycaps is fine except for one very important aspect: the mount (the cross-shaped hole) is too wide. It doesn’t fit on the switches right. Unusable.
BUT, being crafty and reckless I found an elegant solution… Melted wax!

The keycap in this picture is from the second attempt; didn’t take pictures the first time.
As silly as it may be, it worked. There’s barely a wiggle and my thumbs are much comfier than before. You gotta be careful when doing this (👨🚒🔥😱). Getting melted wax inside your switch is a good way to ruin it. I applied a bit of extra lube to compensate for the tiny wax residues I couldn’t get to and the switch feels almost has good as its neighbors.
Of course, using melted wax is a dirty hack and there was still a bit of a gap I wished to fill. So I tried again!
Second attempt
I modified the first model to make the top surface a bit bigger, reduce the size of the mount by 0.9mm and tried different settings. The 3D model of the second attempt is also available on Thingiverse.
| Material | Technology | Resolution | Cost per Keycap |
|---|---|---|---|
| acrylic resin | SLA | 50 microns | 8.26$CAD |
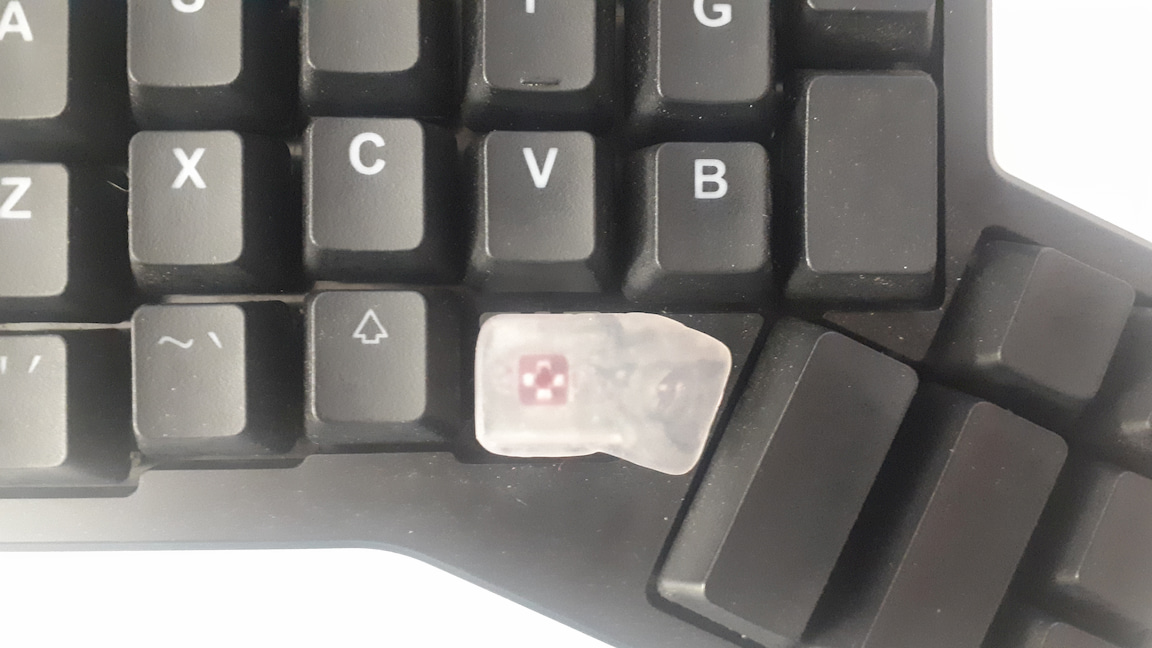
Sadly, the mount was still too big. I did the wax hack again, but with a different candle and it didn’t work as well… Went back to the original candle and it’s much better.


The acrylic resin is much smoother, transparent and twice the price. Nylon 12 feels all right, but its porous nature gets it dirty quickly.
Key takeaways
It is possible to 3D print your own keycaps, but getting it right is not that easy.
If you don’t have your own 3D printer, sending models to a printing shop can get expensive after a few hit-and-misses.
3D printing those keycaps was worth it. My Ergodox is comfier.

Evolution of my pre-thumb-cluster keycaps.

I’m going to rock those new keycaps for a while now. Even though they’re ugly.